 Hi there, as I write this blog we are having the most glorious weather for the first May Bank holiday in the UK and it is fabulous! I'm listening to the Peaceful Guitar play list on Spotify and there's a lovely breeze wafting through the house....mmmmm... to top it all I love this kit!
 Powertex has taken this one right back to basics to show how you can create some really super projects by using just the magic of Powertex, a nicely constructed kit and the basic pigment kit.
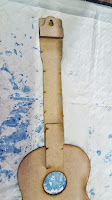
So first I joined the 2 main pieces together with Bronze Powertex and added the hanging bracket as show in the two images below.

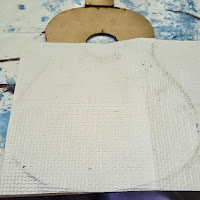
One the back was dry I used the textured paper to cover the front of the guitar, again using Bronze Powertex - there's no need to use any other mediums as the magic of Powertex covers so many uses.
You can see how I made two pieces to cover the body if the Guitar. I also laid out the main design of my piece. The only parts of the kit I didn't use were the two paper flowers. I used more of the Bronze Powertex to stick the embellishments in place, the only thing I added was some jute string. Once everything was in place I left it to dry overnight.
Next I used PowerColor Pigments and Easy Varnish to build an Ombre shading moving through from Yellow Ochre to Red Ochre. I repeated this shading several times until I got the effect I was after.
To build the colour and shading I also added in some Titanium white in the latter layers.
I coloured the embellishments as well.
Once I was happy with the main colour I mixed up some silver Colortrix and cloured the strings.
I then added Burgundy PowerColor to the heart/flower embelishment and finally added some Rich Gold Colortrix to the centre of the two main embellishments and a faint brushing over the textured paper.
Below are some closeups to help you see the effects.
Hope you enjoy the Powertex Design Teams take on this project and we inspire you to have a go yourself. Don't forget to share your makes in the Powertex Studio on Facebook.
Happy Crafting
Fi


No comments:
Post a Comment