Showing posts with label Powertex. Show all posts

Monday, 2 July 2018

Upcycled

Welcome to my project to the June Make it Mixed Media Challenged Blog.  
This months challenge is UPCYCLE and for my project I have made a water pot from a coffee jar using Powertex and various bits and bobs left over from other projects as well as some totally beyond it old paintbrushes that were destined for the bin!


So here is what I started with: bits of hessian, t-shirt yarn, bandage/gauze, rope, left over Powertex fossils, canvas spacers and a coffee jar.  The only new part of this projects was some Powertex grey.

I snapped off the paintbrush handles so they finished just below the rim of the jar. I used the left over handles as spacers.
I poured some Powertex onto a leftover plastic plate...no more plastic ones in the house EVER!

First I dipped the gauze into the Powertex and worked it well in.  I wrapped it around the jar making wiggly wave type texture. I then worked Powertex into the hessian, rope and t-shirt yarn.  Next I coated Powertex on to the brushes, fossils and canvas spacers. I places the brushes onto of the gauze and wrapped hessian around the jar holding the brushes in place.
I continued to build up the jar with the various items and under the fossils I added some kitchen paper that I had worked Powertex into.  

To finish this stage I smeared Powertex over the neck of the jar, some of this will eventually wear off but it gives it texture and detail.  Set aside to dry - I worked outside in the sunshine and my was touch dry within half an hour max and fully dry in around 3 hours. 
Once it was dry I used some Easy Varnish and pigments in Ultramarine, Turquoise, red ochre and white.  I started with ultramarine over most of the jar and embellishments, then added turquoise and white. I used the white quite sparingly over the sails (canvas spacers) and the wiggly wavy area...you can see where I am going here can't you?
Finally I used red ochre and a muddy mix to add some colour to the fossils.

Can you spot the extra make in the bottom left image?

This was the jar lid.  I used the same pigments to colour the outside, finishing with some pearl pigment.  


So two makes all from the same jar!  The lid will be a tealight holder for the garden.

Have fun!

Bye for now, Fi xx


Thursday, 28 June 2018

Bister Mister Spray Tray

A crafter can never have too much storage and what is nicer than decorating your own?  I'm making quite a few bits at the moment in an effort to make my tiny weeny art space more colourful and more organised.  My latest piece is done with Powertex.
I made the kit up and then coated all over with Ivory Powertex.  I then added a texture paste, made up from Powetex and 3D flex. I roughly spread it over the two ends and in patches on the top of the storage caddy.  
On the longer sides I used Easy Structure to push through two of the artist quote stencils.  I then sprayed with blue bister and left to dry.
I also stencilled one side of the carry handle and on the other I roughly spread some of the 3D flex texture paste and pressed a plaster piece into it.
Once dry I washed back removing the surface bister and leaving a nicely stained base.  The bister had encouraged some great crackles on the ends and some nice fine ones on the top.
Next I used Acrylic inks from The Secret Art Loft to build up layers of colour and to bring out the crackles.

I used Aqua, Viola, Palm and Deep Sea which I applied randomly with a brush, wiping back with a wet wipe. This enabled me to build a colourful piece with a nice splodgy arty vibe.


Over the handle I added the colours and let them drip down, this gave a nice deep colour in the corners where the handle met the top of the tray.

Finally I mixed up some Bronze Colortricx with some Easy varnish and dry brushed the art quotes.

I also used some Secret Art Loft Blueberry Pie acrylic paint and dry brushed over the rough textures to add further depth.  
That's all for now
Fi xx


Monday, 21 May 2018

Mixed Up Blog Hop

I hope you are enjoying meeting the Mixed Up Design Team! Welcome to my blog.

As you know, each of us is sharing our favourite makes for Mixed Up today, and the project I’ve chosen to share with you is Deep Ice.

I created Deep Ice for the December 17/January 18 Magazine issue. I adore getting texture into whatever I create and this one is a very deeply textured and tactile piece made from Powertex and mediums created to work with it. 

It took a few days to create from start to finish just because you need to be patient and let the layers of 3D Flex texture paste dry out before you start adding colour. This was the base layer…

And this shows the build up of colour using pure powder pigments blended into Powerwax which is water based and archival quality..

I’m also showing a sneak peek of my Upcycled Powertex Japanese Journal that was published on Mixed Up Mag on Friday 18th May! You need to be a subscriber to view this step by step project.  
Mixed up Mag is such awesome value, not only do you get 3-4 step projects added per week, but there are downloadable pdfs for each project plus lots of other tips and tricks, how to's, interviews, product reviews and much more.The Mixed Up website has tons of mixed media projects, including these and many more!  If you want to know more pop on over to the website here
*
Make sure you visit everyone’s blog to be in with a chance of winning the Grand Prize! Here’s the hop list!

Mixed Up Magazine
Leslie Lineberry
Riikka Kovasin
Erica Evans
Debs Wainwright
Carol Fox
Corrie Herriman
Fiona Potter YOU ARE HERE
Mags Woodcock
Lisa Taggart
Nikki K
*
Hop Rules:
Visit each designer and leave a comment on their blog for a chance to win a fabulous mixed media prize
The draw is open interntionally
The draw closed 31st May at midnight GMT


Wednesday, 14 March 2018

Altered Time

WOW what a cold and long winter we've had here in the UK and it's something we don't get very often - Time just seemed to drag on and on ... which brings me to my latest blog over on the Powertex DT.

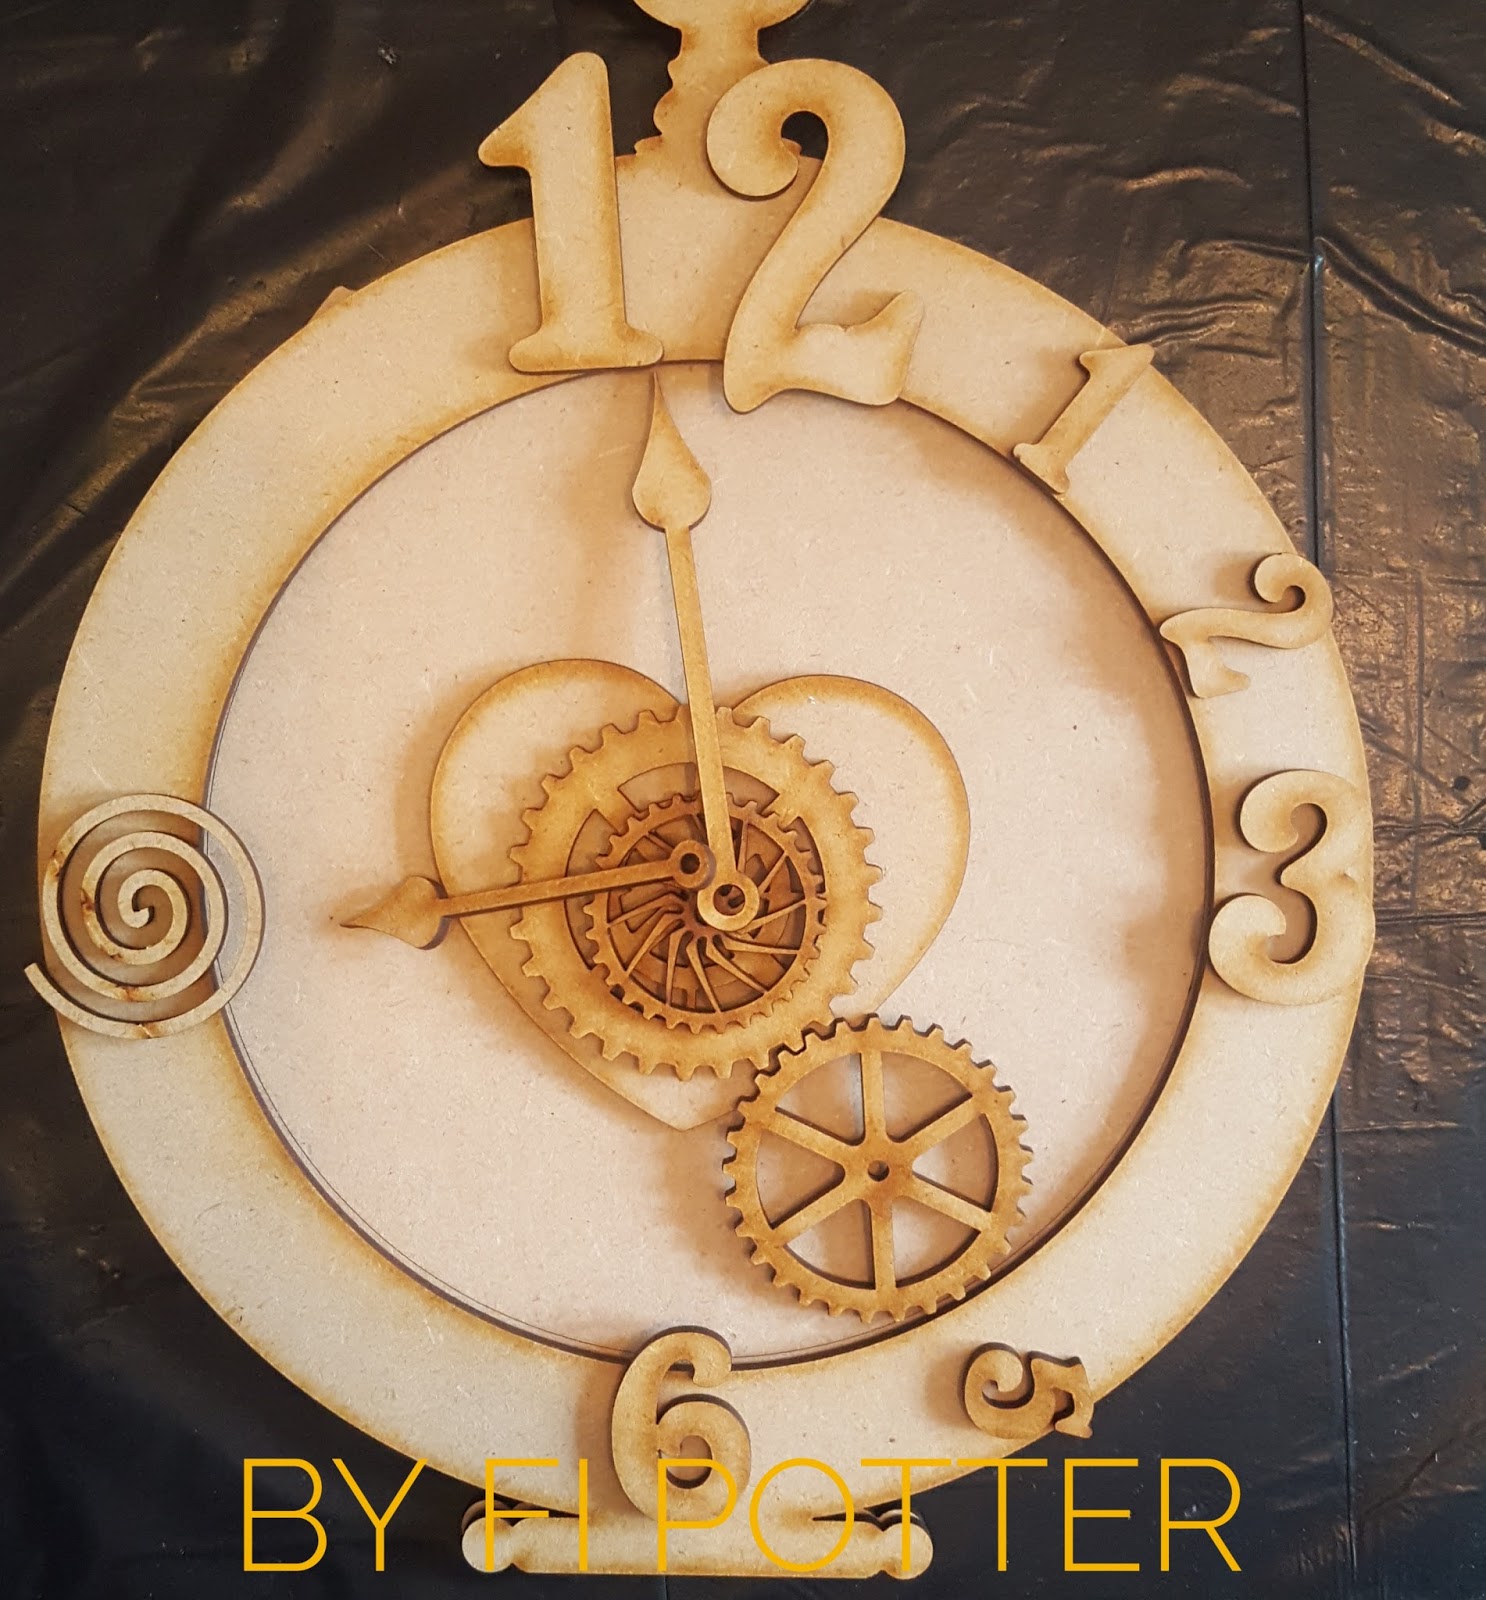
Using the fabulous March  Project Pack  I had oodles of fun creating this Pocket Watch taking the Mad Watch scene from Alice in Wonderland as my inspiration.  I didn't add butter or mustard but  Idid use some of them to pull together my colour pallet.

So first I unpacked and laid out the ingredients from the project pack, picked out some PowerColors and mixed up the black bister from the kit.

I always like to get a rough layout even though I know it will change once I get started. 

With this one I wanted a slighty deeper clock face so I used some MDF dropouts to raise the rim above the clock face.


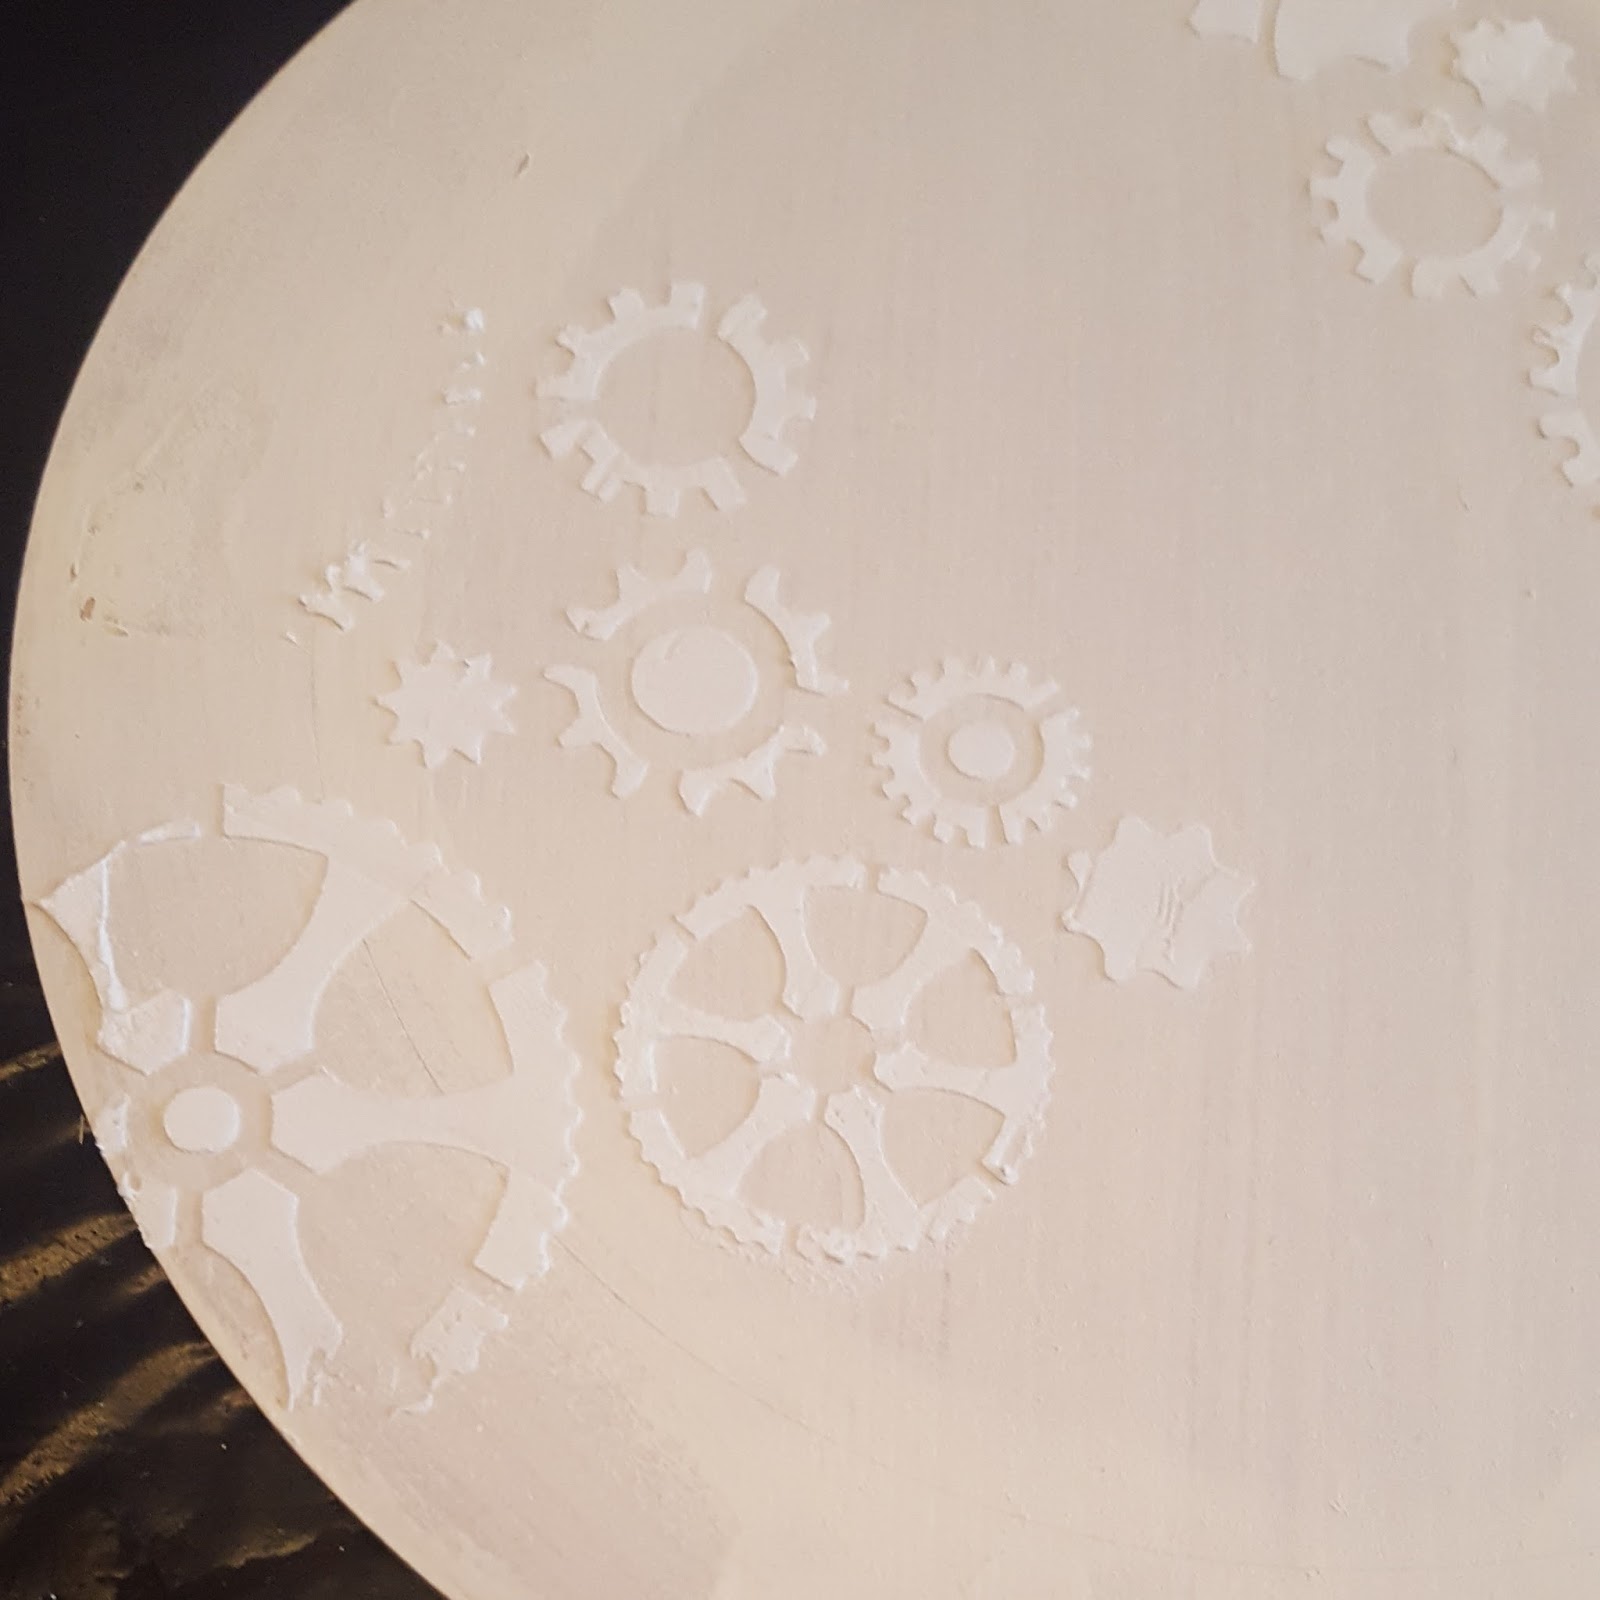
First I used some Easy Structure and a cogs stencil (from my own stash)  to create some background texure that fitted with the theme.

Easy Structure dries really quickly and I prefer to let it dry naturally but if you are in a hurry you can blast it with some heat from a hair dryer or heat gun.            

Once the easy structure was dry I coated the whole layer  of Ivory Powertex from the kit (with a generous amount where there was no stencilling)

I then placed some of the drop outs around the perimeter of the base, added the heart in the centre and the largest cog on top.   


I added some Ivory Powertex under the outer rim of the top layer of the watch and placed on top taking care to line it up accurately.  I applied more Powertex  over the top layer and then sprayed generously with black bister.

I used a hairdryer to dry and create some areas with a  bister split creating more texture and interest.

This part was all done in around 10-15 minutes.

While this finished drying I coated the numbers, clock hands and a few circle mdf dropouts with ivory. I then did the same to the remaining cogs which I placed into position while they were still wet.

The image tp the left shows where I thought I would place them, but I did move them around a few times before I put the Powertex on.  


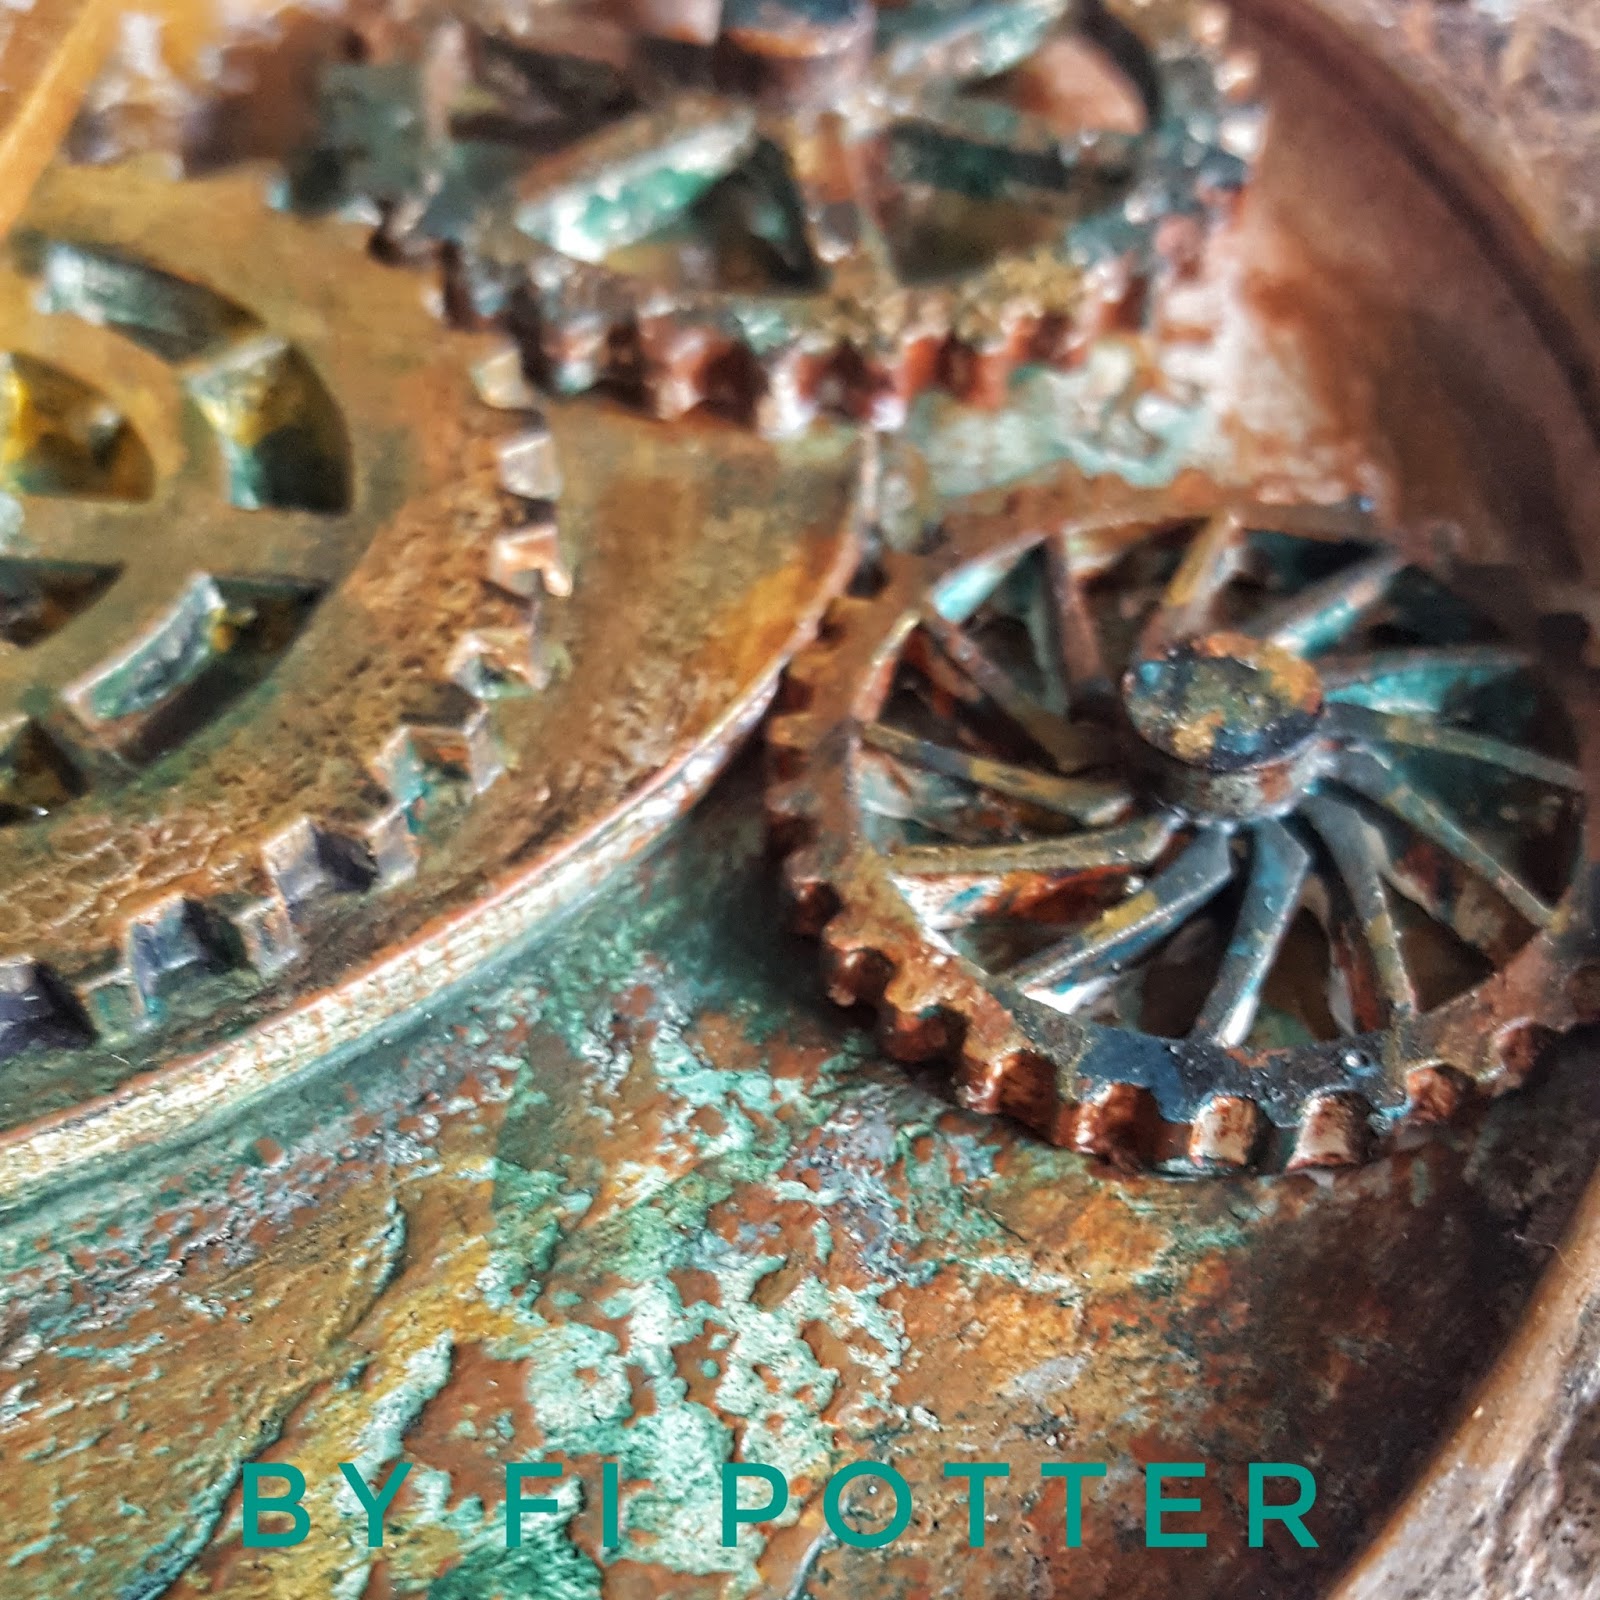
Once the cogs, numbers, hands etc were dry I used Rich Gold Colorticx and Easy Varnish to richly coat the numbers and clock hands.  

I applied Yellow Ochre, Red Ochre and Dark Green pigments randomly over the cogs and circles and applied with Powertex pressing firmly on each piece until they had started to stick.


I used bronze gold colortricx to dry brush the background of the clock face.  

I then added washes of turquoise pigment as well as the yellow, red and dark green pigments to build up a rusty look.

I built this up over several thin layers.


I added a few flat back crystals to highlight where there were missing numbers and also popped some rusty circles to finish off the smaller cogs.


I did a similar finish to the stand using Ivory Powertex, Black Bister as well rich and bronze gold to give a cohesive look to the finished piece.

Below are some other close ups so you can see how it was all finished.

And here is the finished altered timepiece...


Have fun and don't forget to share your makes with us over on Powertex Addicts or why not join our fab new group The Powertex Studio where Certfied Powertex Tutors as well as YOU can share your creations and we can inspire each other.


Bye for now
Fi xx

This is what I had left!!!!!


These are the pigments I used and below are some close ups...


Sunday, 14 January 2018

An Arty Crafty Happy New Year with gratitude and thanks

Hi there and a Very Happy New Year! 

Better two weeks in than never!  Can you believe we are half way through January already?  I cannot believe how lucky I was as 2017 drew to a close.

I was lucky enpugh to win Juna Biagioni's give away of a place on Dirty Footprints Studio 21 Secrets Art journalling course on which she is teaching.  I don't know about you but I have never been lucky with these until November that is.  

I've entered hundreds of competitions and give aways over the years but this one came on the day we said goodbye to our wonderful arty friend, Liz Welch.  Liz was so encouraging of not only my art journey but that of two great friends we met monthly to do art journalling until sadly she became poorly again.  We each had some wonderful arty crafty things happen at the end of 2017 and we feel sure Liz sprinkled some stardust on us.  Thank you Liz for being part of our lives, we will never forget those very special times we shared with you.

In December I had a fun crafty day with my friend Nikki K and made a few tags for her using some of the great Tando and Decoart Kits she had on her Hochanda shows on Christmas Eve. We had a lot of fun!  I'll grab some photo's for another blog soon.

Then Wham! It was Christmas!  I got very painty over the festive break and did a lot of Powertex - of course! I mean life would be boring if I didn't have Powertex in my life.  

I entered my Winter Ice Cave piece in a competition over on Abyssimo Open Studio Group over Christmas as was delighted to come third.  My prize was a place on one of her wonderful courses.  I chose Abyssimo's Marvellous Mixed Media 3-D Techniques course and I have watched the videos twice already!  I can't show you the piece yet as it is winging it's way to Canada as part of an ATC Swap organised by my friend Hannah Oxberry and Mixed up Mag.  What fun I have had!

As if that wasn't enough, oh my what came next reduced me to happy but grateful tears! 


I was thrilled to bits and over the moon to be awarded Powertex Team Member of the Year at the end of my first year on the Powertex UK DT! I can't thank Tracey and Garry who are Powertex UK for all their encouragement and opportunities they have given not just me but my DT teamies and Powertex Tutor colleagues.  


On top of all that I was asked to be on the DT for a second year! 

So that's my news and I can't tell you how grateful and thankful I am and how much I hope you too get have some great times arty crafty creative times ahead in 2018.

So what have you been creating?  Share on my page (or over on Powertex Addicts United if you've been creating with Powertex).  We all love to see what you have been making.

Oh and while I think of it, there have been some great new Powertex Blogs already this year from my team mates. I've got a blog out at this week using a fabulous Powertex Owl Project Pack.  Check the blog out if you need some inspiration to get you started.


Happy Creating
Bye for now

Fi

Wednesday, 15 November 2017

Powertex Hat - NEC November 2017

Hi there long time no see!

I took a nice break and enjoyed 2 weeks in Cornwall in September and October just seemed to disappear!  Then November came along with a fabulous Hobby show at the NEC and I had a great time with Powertex UK demonstrating all kinds of texy things.


There was a lot of interest in the hat I bought along to alter with Powertex and so as promised here is a quick step by step photo story of how this old felt trilby was transformed into a bit of goth type magic. 


I started with a selection of fabrics and added MDF, Plaster and sand embellishments.


Once it was dry I added a variety of pigments to give it colour and to bring out all the fabulous textures.


It really was a great project to make and I wore it the following weekend at Ministry of Mixology, Coventry and here is the finiished hat.


Products used were all Powertex:

Have fun and happy 'Texing

Bye for now
Fi


Monday, 4 September 2017

Sophie's Summer Superhero Project - Part 2

Well September is here already and Sophie's Super Hero has been updated.  I can't believe the summer holidays went by so quickly but Sophie and I had so much fun with this.  

There are still another 2 or 3 stages to go so we may need to drop "summer"!!


After a little holiday in Weymouth, the excitement of a new baby in the family and a party or two, we did stage 2.  For this we started with a cotton vest which Sophie rubbed Ivory Powertex into, OK i did give her a little help! 

We also worked Powertex into a length of cotton t-shirt fabric. Once it was well covered, we eased the vest over the body and then draped the fabric around the hip to make a short skirt.  (There will be another layer in stage 3.)


We then started the first of the decoration or embellished layer.  For this we needed purple Powertex.  Sophie suggested mixing blue and red Powertex together, but it wasn't quite dark enough so we also added a tiny bit of black.  

We coated some strips of lace and a leather belt which we draped onto Teleporter's hips (recycling is so much fun with Powertex!). We also worked some yellow Powertex for a second decorative strip of lace.


Next we wanted to add the green shoulder pieces and buttons.  If you can remember from Sophie's plan, Teleporter has two buttons, one of which has a secret power.

We mixed some ivory and green Powertex and worked this into some woven cotton dishcloth fabric.  We also coated two slices of wood to be the base of the buttons. There were some great embellishments on the belt which Sophie painted with yellow Powertex too.


That all took 2-hours and so we stopped there ready to have more fun with the final layer of embellishments next time.  
I'm so impressed by Sophie's concentration, I forget she is only 7-years old sometimes! The fun and laughter we have is fantastic and that includes seeing who gets the most stray Powertex on our arms, I think there was a splodge or two that she managed to get on my face too!!!

Have fun creating with Powertex and we will be back with the next stage soon!

Fi xx

Friday, 25 August 2017

Powertex - Nefertiti's Collar

Hi all,  I thought it was time to share a couple of my projects from Powertex UK's recent Egyptian themed shows on Hochanda.
So today I'm going to share how I made Nefertiti's gemstone collar.  Not real gemstones of course but made with Black Powertex and  3D sand.  I mixed the Powertex and Sand to a thick paste and pushed into a cabochon mould.  These take a few days to dry so make them a few days before you want to make your collar.


I then worked Ivory Powertex into some woven cotton tape and wrapped this very tightly around the collar base.  

Make sure you overlap the edges evenly as they will form part of the texture of the finished piece.

Tip: these collars have a habit of slipping forward so you might want to drill a hole on each end to fix a jump ring, some chain and a nice clasp to for peace of mind.  I didn't but I really wish I had as the weight pulled it forward even more.


Next I added some sand to a little Powertex to make a paste and put a small dollop onto the back of each faux gemstone and then pushed these into the now dry collar.

Don't add too much or it oozes out but the addition of the paste really help grab the weight of the faux stones onto the near vertical collar and made it easier to work with.


Once the stones were in place, I worked some more ivory Powertex into some paper string.  

I love using paper string where I want a twisted rope effect, it's light weight and absorbs the Powertex so well.

Starting on the lower edge of each stone, I tightly wrapped the string around to give the effect of a twisted wire setting.

Cut the end of at the opposite lower edge of each wrap.


I then coiled a little of the string and pressed one end onto the collar at the our edge and threaded under and over each stone finish with another coil on the opposite side.

Next I painted a thick layer of ivory powertex over the whole piece apart from the stones.  

I then sprayed the whole piece with brown bister and dried with the hairdryer, this added another layer of texture and in some places where a bister split was achieved.  

One it was dry I used red ochre, ultramarine blue and dark green Powercolor pigments which I mixed with Easy Varnish and built up colour on the stones.  

I was very careful to make sure the colour didn't go onto the rope.  I then mixed up Rich Gold Colortrix with more Easy Varnish and quite heavily painted the rope setting and less heavily on the remaining areas.  There's a useful Pigment Tray now that has a small quantity of pigments to help build up your pallete.


As a finishing touch I added some flat back crystals from my stash in the same colours as the stones.
Now here's a little tease, these stones have been enhanced even further, so check back late September/early October and see how these stones look even more realistic! 

That's all for now, let us see your makes on Powertex Addicts United.

Keep creating!
Fi xx