Showing posts with label powertex design team. Show all posts

Friday, 13 April 2018

It's always time for tea!


Hi there, did you see Tracey on Hochanda? Have you got your Alice themed projects yet?  

I had such a lot of fun creating this colourful piece.  I'm popping some photos below so you can see the steps I took to create it.

First I added rice paper using Easy Coat matte and did a loose layout


Next I covered everything in ivory Powertex and sprayed with blue and red Bister,  and then left overnight to make sure it was thoroughly dry


I then washed back the bister to leave the nice soft blues and pinks 


Next I used Easy Structure and some stencils to create extra texture  once that was dry I used the gloriously bright Secret Art Loft pigments and inks as well as some Powercolor


Finally I drilled holes with a 2mm drill bit and threaded through some paper string to hang my tea shoppe sign with

Hope you like it and have loads of fun and hope we are inspiring you to create your own unique pieces

Bye for now
Fi


Wednesday, 14 March 2018

Altered Time

WOW what a cold and long winter we've had here in the UK and it's something we don't get very often - Time just seemed to drag on and on ... which brings me to my latest blog over on the Powertex DT.

Using the fabulous March  Project Pack  I had oodles of fun creating this Pocket Watch taking the Mad Watch scene from Alice in Wonderland as my inspiration.  I didn't add butter or mustard but  Idid use some of them to pull together my colour pallet.

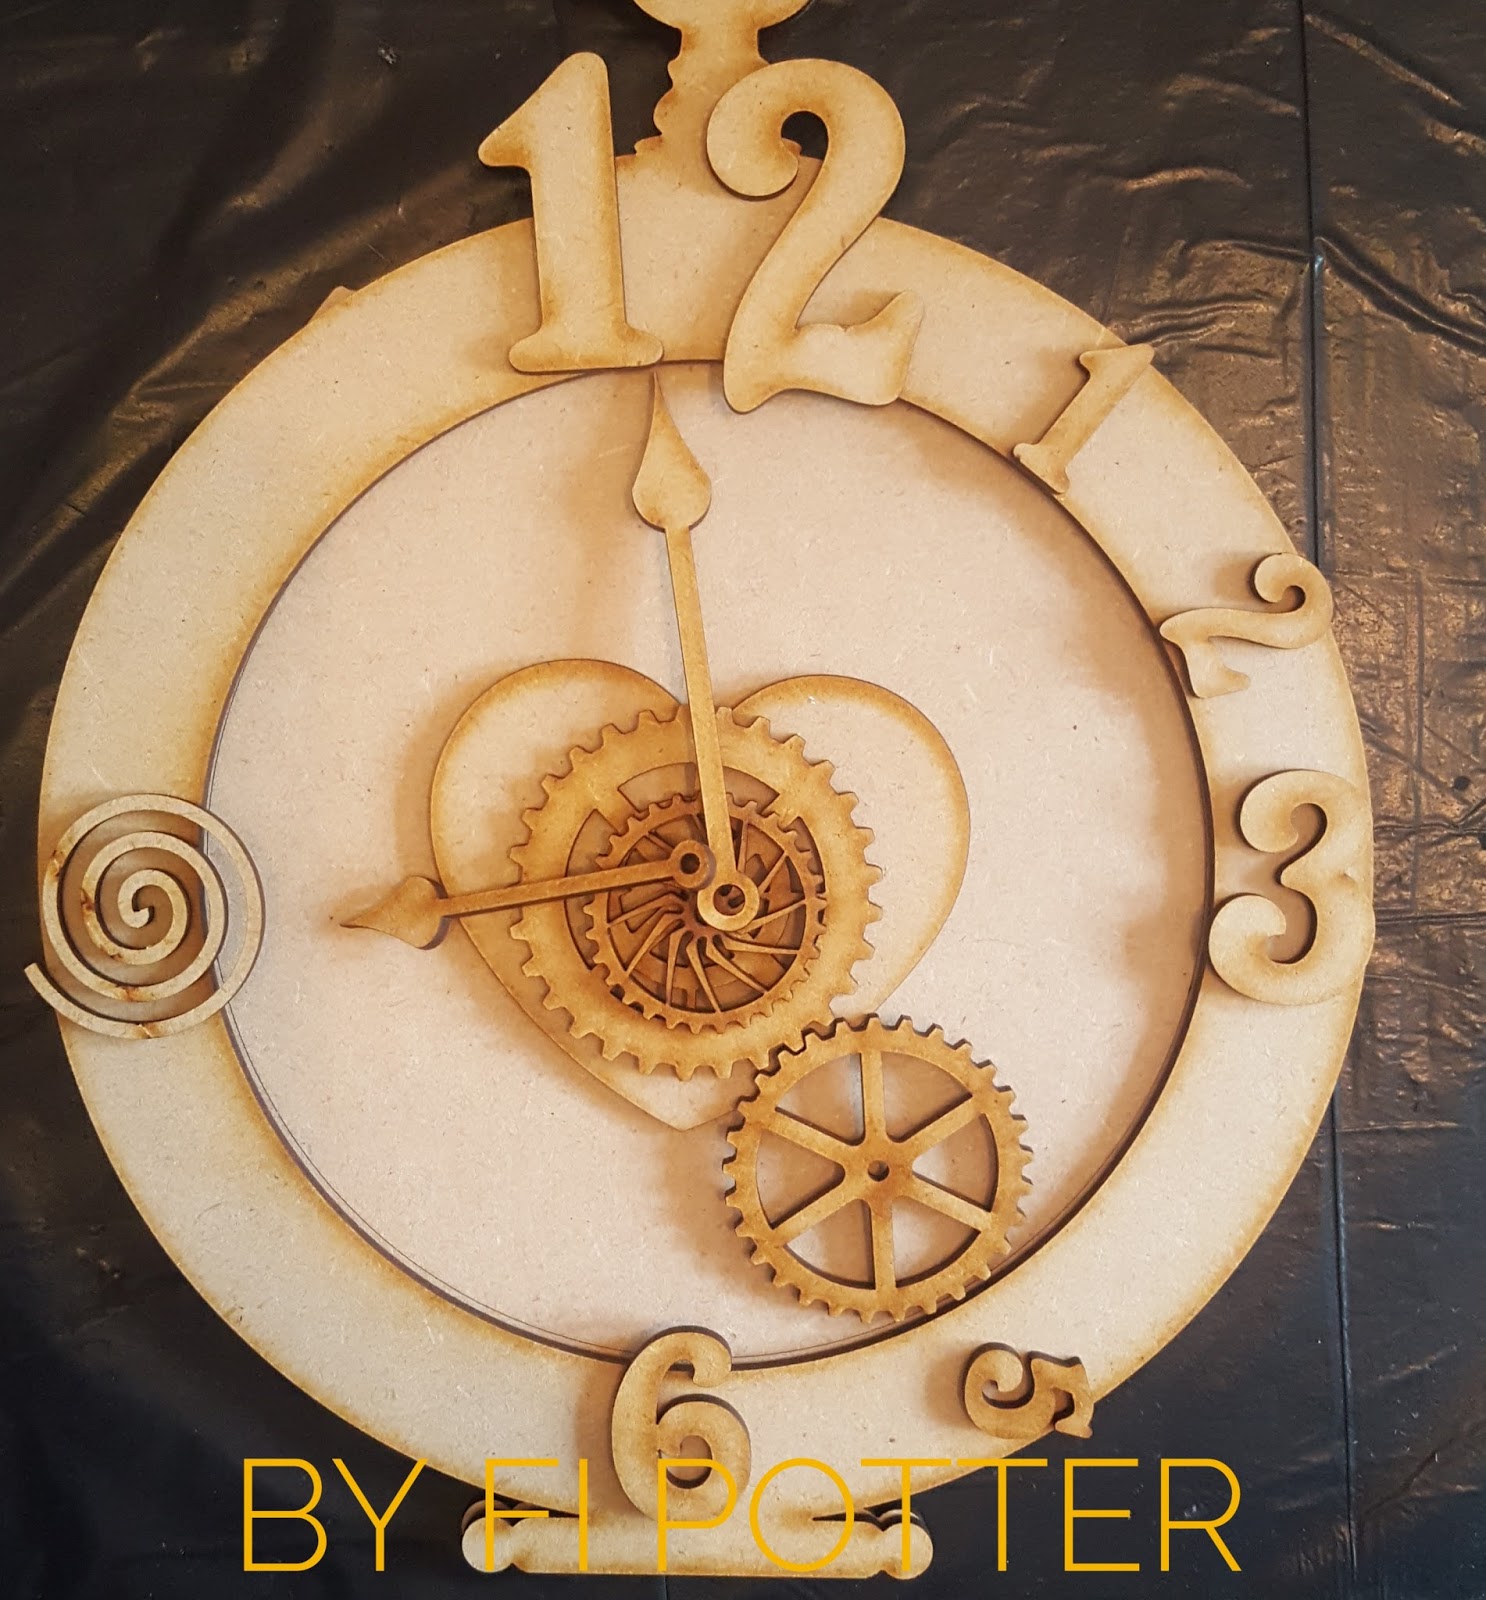
So first I unpacked and laid out the ingredients from the project pack, picked out some PowerColors and mixed up the black bister from the kit.

I always like to get a rough layout even though I know it will change once I get started. 

With this one I wanted a slighty deeper clock face so I used some MDF dropouts to raise the rim above the clock face.


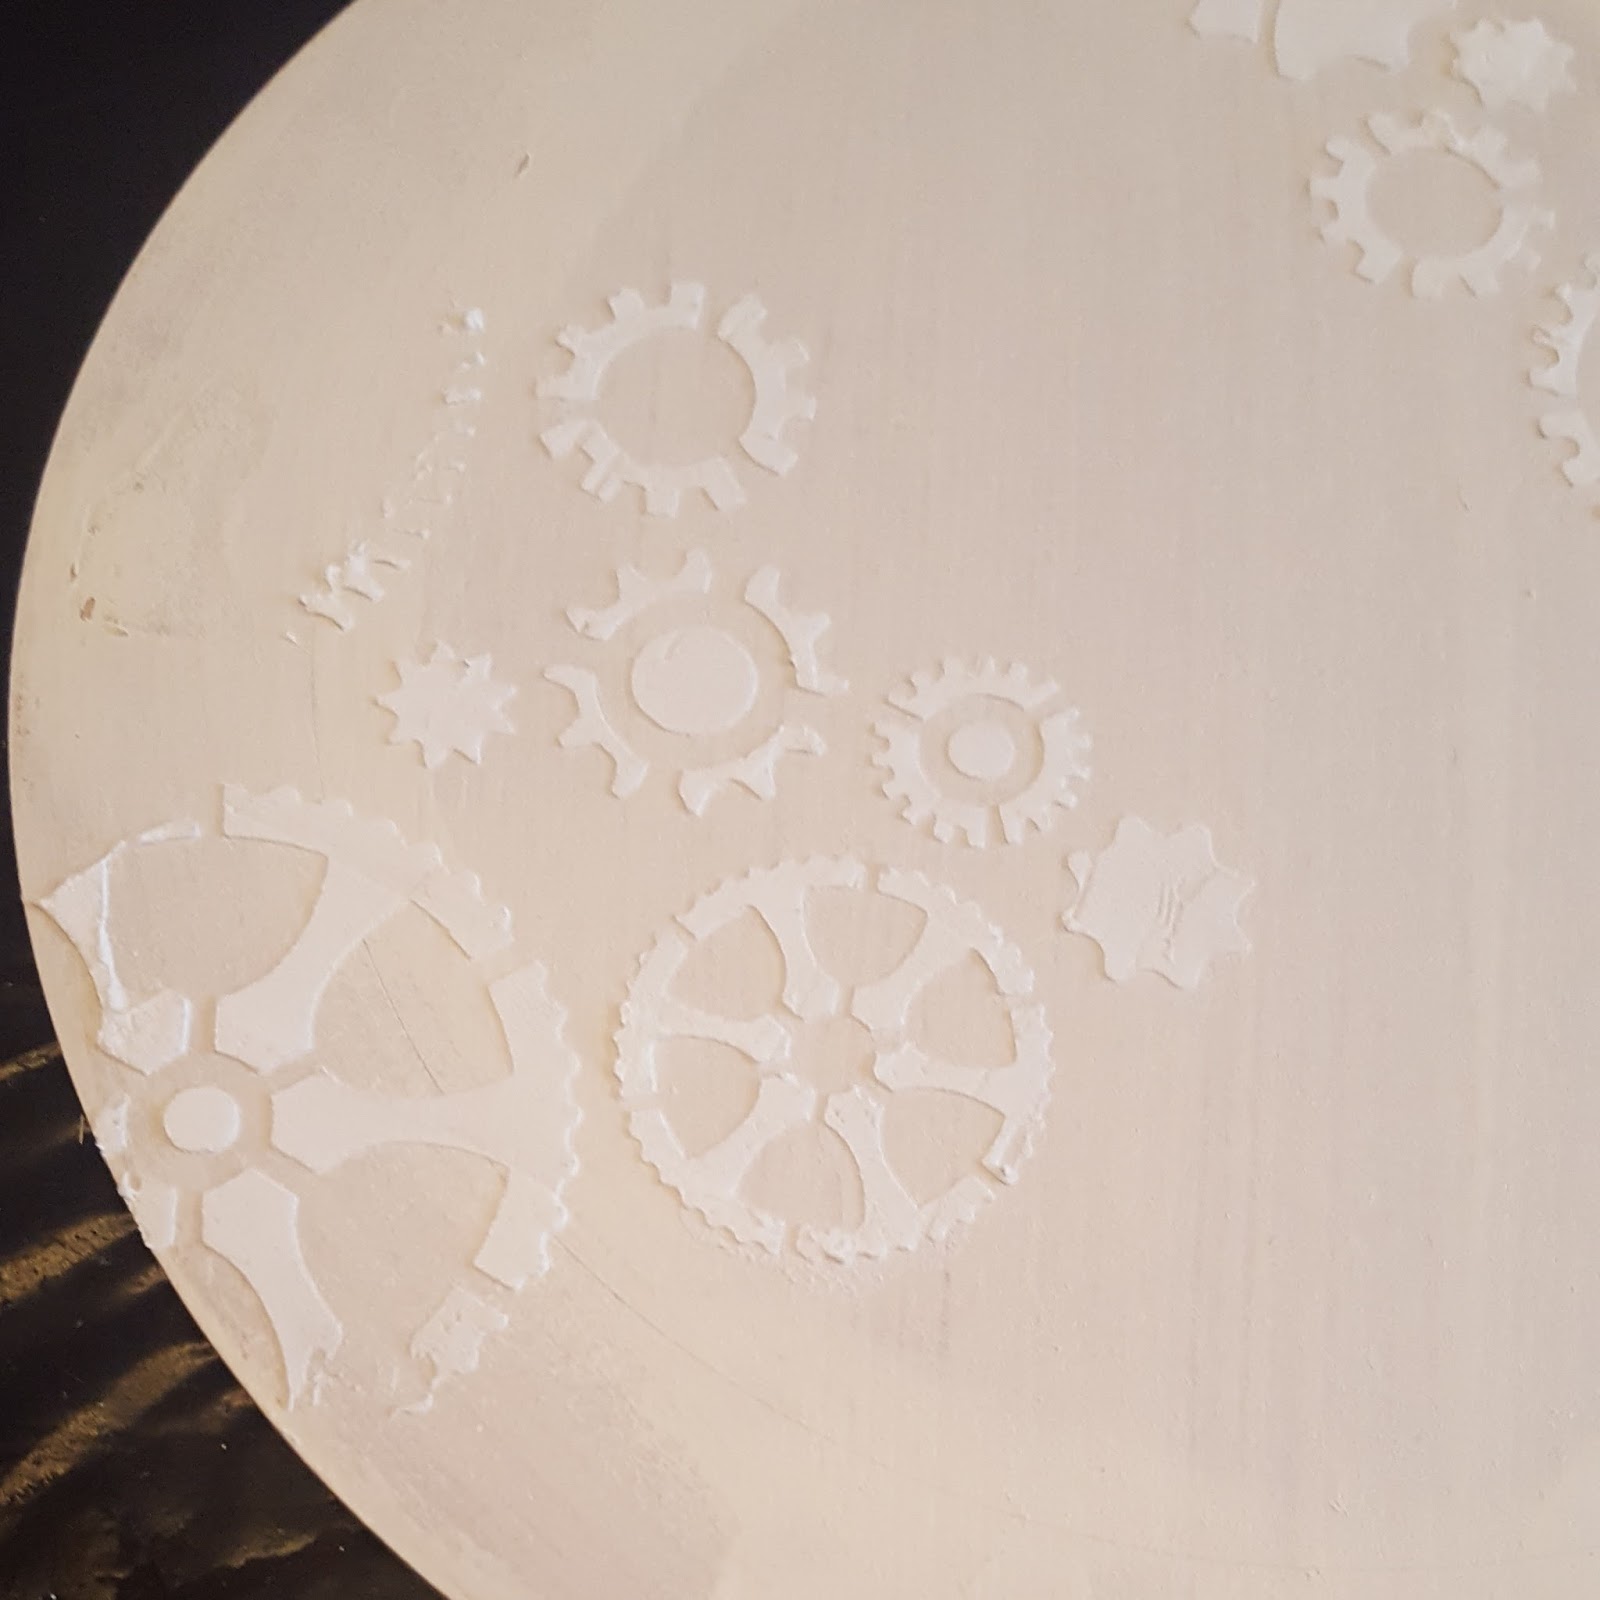
First I used some Easy Structure and a cogs stencil (from my own stash)  to create some background texure that fitted with the theme.

Easy Structure dries really quickly and I prefer to let it dry naturally but if you are in a hurry you can blast it with some heat from a hair dryer or heat gun.            

Once the easy structure was dry I coated the whole layer  of Ivory Powertex from the kit (with a generous amount where there was no stencilling). 

I then placed some of the drop outs around the perimeter of the base, added the heart in the centre and the largest cog on top.   


I added some Ivory Powertex under the outer rim of the top layer of the watch and placed on top taking care to line it up accurately.  I applied more Powertex  over the top layer and then sprayed generously with black bister.

I used a hairdryer to dry and create some areas with a  bister split creating more texture and interest.

This part was all done in around 10-15 minutes.

While this finished drying I coated the numbers, clock hands and a few circle mdf dropouts with ivory. I then did the same to the remaining cogs which I placed into position while they were still wet.

The image tp the left shows where I thought I would place them, but I did move them around a few times before I put the Powertex on.  


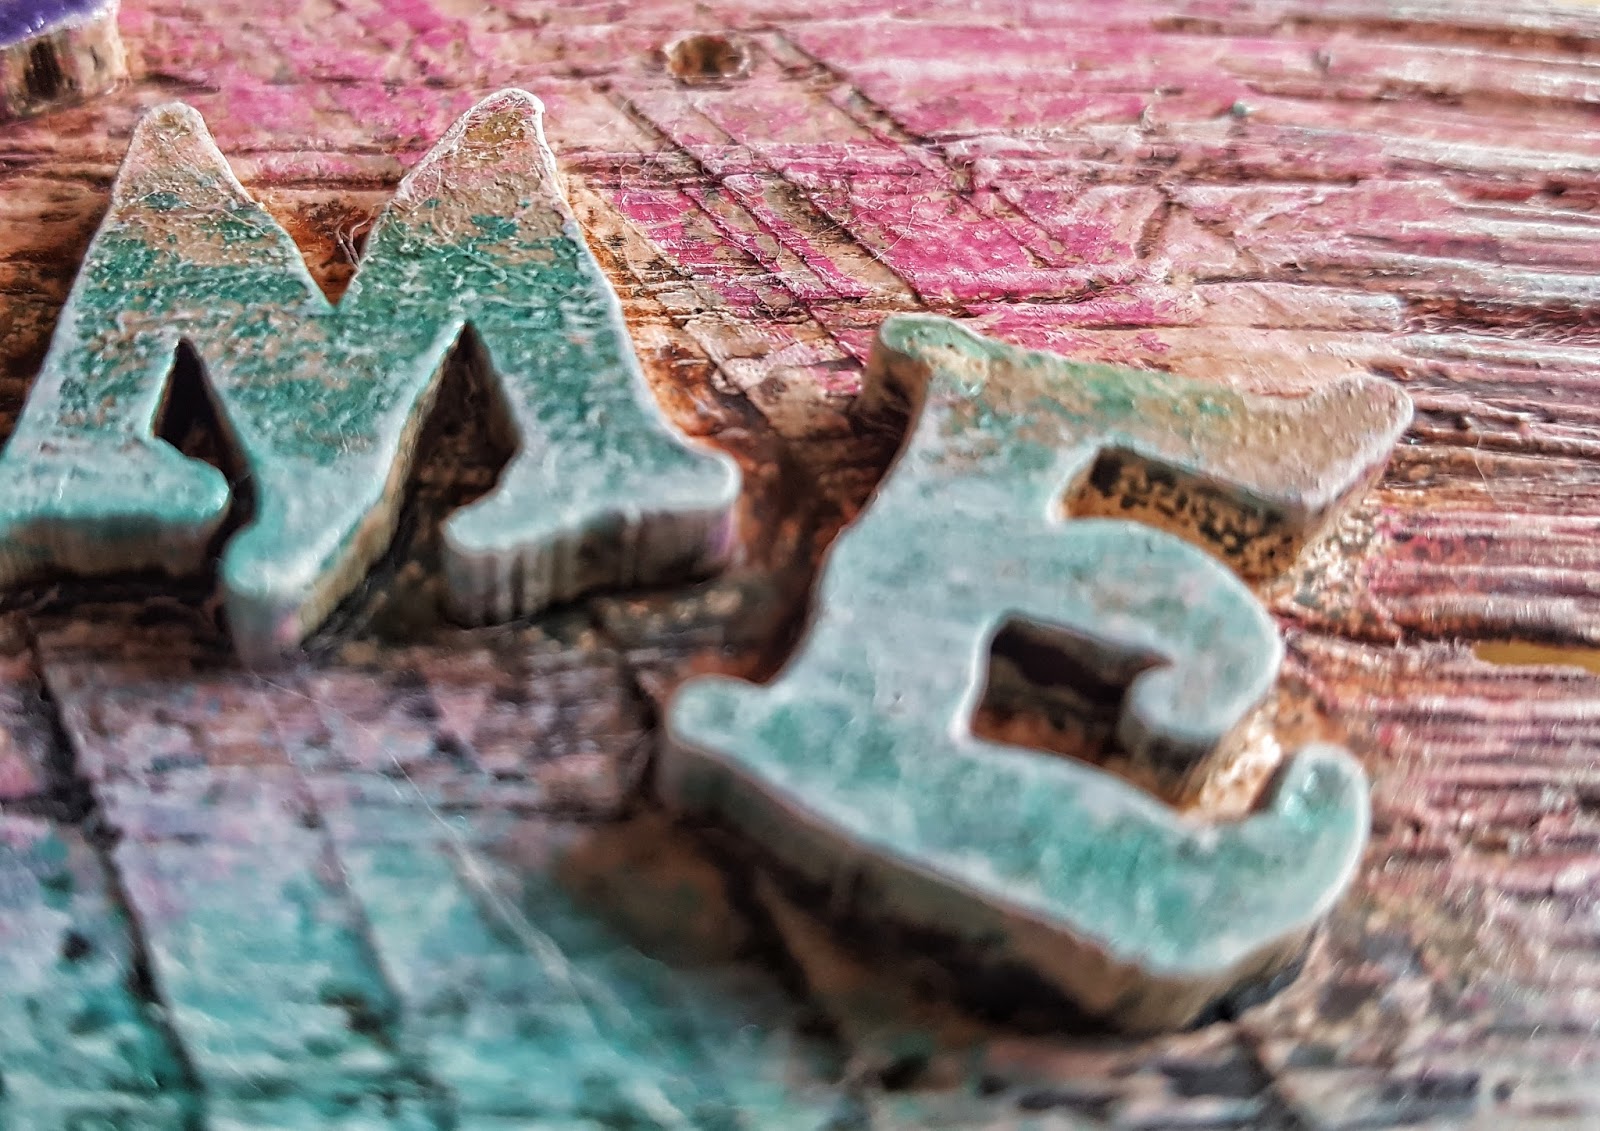
Once the cogs, numbers, hands etc were dry I used Rich Gold Colorticx and Easy Varnish to richly coat the numbers and clock hands.  

I applied Yellow Ochre, Red Ochre and Dark Green pigments randomly over the cogs and circles and applied with Powertex pressing firmly on each piece until they had started to stick.


I used bronze gold colortricx to dry brush the background of the clock face.  

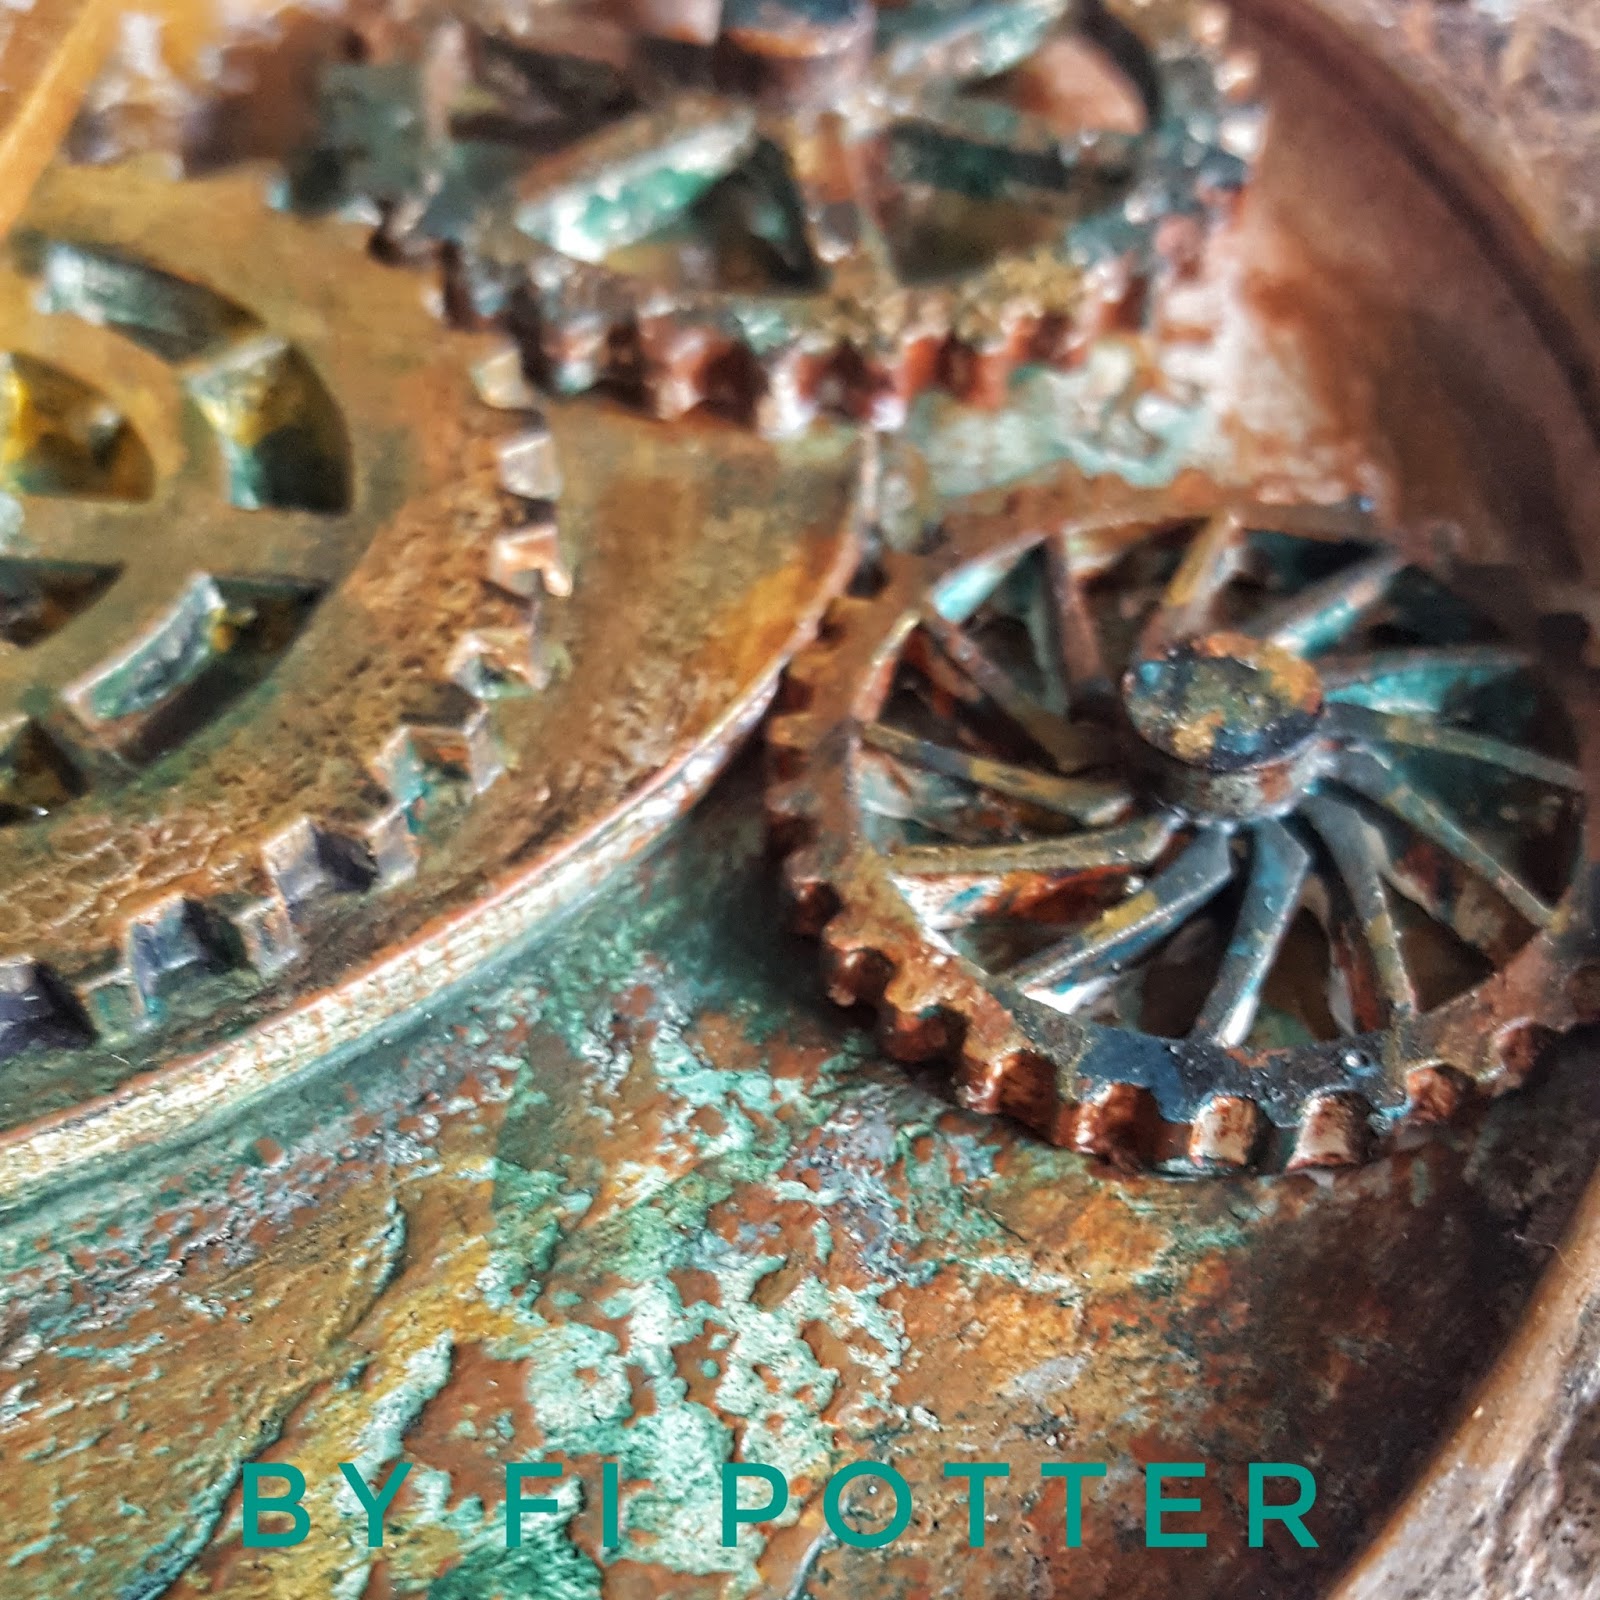
I then added washes of turquoise pigment as well as the yellow, red and dark green pigments to build up a rusty look.

I built this up over several thin layers.


I added a few flat back crystals to highlight where there were missing numbers and also popped some rusty circles to finish off the smaller cogs.


I did a similar finish to the stand using Ivory Powertex, Black Bister as well rich and bronze gold to give a cohesive look to the finished piece.

Below are some other close ups so you can see how it was all finished.

And here is the finished altered timepiece...


Have fun and don't forget to share your makes with us over on Powertex Addicts or why not join our fab new group The Powertex Studio where Certfied Powertex Tutors as well as YOU can share your creations and we can inspire each other.


Bye for now
Fi xx

This is what I had left!!!!!


These are the pigments I used and below are some close ups...


Monday, 4 September 2017

Sophie's Summer Superhero Project - Part 2

Well September is here already and Sophie's Super Hero has been updated.  I can't believe the summer holidays went by so quickly but Sophie and I had so much fun with this.  

There are still another 2 or 3 stages to go so we may need to drop "summer"!!


After a little holiday in Weymouth, the excitement of a new baby in the family and a party or two, we did stage 2.  For this we started with a cotton vest which Sophie rubbed Ivory Powertex into, OK i did give her a little help! 

We also worked Powertex into a length of cotton t-shirt fabric. Once it was well covered, we eased the vest over the body and then draped the fabric around the hip to make a short skirt.  (There will be another layer in stage 3.)


We then started the first of the decoration or embellished layer.  For this we needed purple Powertex.  Sophie suggested mixing blue and red Powertex together, but it wasn't quite dark enough so we also added a tiny bit of black.  

We coated some strips of lace and a leather belt which we draped onto Teleporter's hips (recycling is so much fun with Powertex!). We also worked some yellow Powertex for a second decorative strip of lace.


Next we wanted to add the green shoulder pieces and buttons.  If you can remember from Sophie's plan, Teleporter has two buttons, one of which has a secret power.

We mixed some ivory and green Powertex and worked this into some woven cotton dishcloth fabric.  We also coated two slices of wood to be the base of the buttons. There were some great embellishments on the belt which Sophie painted with yellow Powertex too.


That all took 2-hours and so we stopped there ready to have more fun with the final layer of embellishments next time.  
I'm so impressed by Sophie's concentration, I forget she is only 7-years old sometimes! The fun and laughter we have is fantastic and that includes seeing who gets the most stray Powertex on our arms, I think there was a splodge or two that she managed to get on my face too!!!

Have fun creating with Powertex and we will be back with the next stage soon!

Fi xx

Friday, 25 August 2017

Powertex - Nefertiti's Collar

Hi all,  I thought it was time to share a couple of my projects from Powertex UK's recent Egyptian themed shows on Hochanda.
So today I'm going to share how I made Nefertiti's gemstone collar.  Not real gemstones of course but made with Black Powertex and  3D sand.  I mixed the Powertex and Sand to a thick paste and pushed into a cabochon mould.  These take a few days to dry so make them a few days before you want to make your collar.


I then worked Ivory Powertex into some woven cotton tape and wrapped this very tightly around the collar base.  

Make sure you overlap the edges evenly as they will form part of the texture of the finished piece.

Tip: these collars have a habit of slipping forward so you might want to drill a hole on each end to fix a jump ring, some chain and a nice clasp to for peace of mind.  I didn't but I really wish I had as the weight pulled it forward even more.


Next I added some sand to a little Powertex to make a paste and put a small dollop onto the back of each faux gemstone and then pushed these into the now dry collar.

Don't add too much or it oozes out but the addition of the paste really help grab the weight of the faux stones onto the near vertical collar and made it easier to work with.


Once the stones were in place, I worked some more ivory Powertex into some paper string.  

I love using paper string where I want a twisted rope effect, it's light weight and absorbs the Powertex so well.

Starting on the lower edge of each stone, I tightly wrapped the string around to give the effect of a twisted wire setting.

Cut the end of at the opposite lower edge of each wrap.


I then coiled a little of the string and pressed one end onto the collar at the our edge and threaded under and over each stone finish with another coil on the opposite side.

Next I painted a thick layer of ivory powertex over the whole piece apart from the stones.  

I then sprayed the whole piece with brown bister and dried with the hairdryer, this added another layer of texture and in some places where a bister split was achieved.  

One it was dry I used red ochre, ultramarine blue and dark green Powercolor pigments which I mixed with Easy Varnish and built up colour on the stones.  

I was very careful to make sure the colour didn't go onto the rope.  I then mixed up Rich Gold Colortrix with more Easy Varnish and quite heavily painted the rope setting and less heavily on the remaining areas.  There's a useful Pigment Tray now that has a small quantity of pigments to help build up your pallete.


As a finishing touch I added some flat back crystals from my stash in the same colours as the stones.
Now here's a little tease, these stones have been enhanced even further, so check back late September/early October and see how these stones look even more realistic! 

That's all for now, let us see your makes on Powertex Addicts United.

Keep creating!
Fi xx


Sunday, 30 July 2017

Sophie's Summer Superhero Project - Part 1

Hi there I hope you are having a great summer with lots of creative fun!  I am having fun with my granddaughter Sophie and this weekend we have started on a major Powertex project.  Let me introduce you to Sophie aged 7 and a half!  [She told me the half is very important because that means she is nearer 8 than 7!]

Sophie has a wonderfully vivid imagination and loves crafting and creating with her mum, her sister and me.

When she is with me we do lots of Powertex.  So far she has made some fairy houses for the garden and also a bird house.  She loves watching films and reading comics with her dad and her brother and writes lots of stories about her own superheros.

Stage 1:

Recently I acquired an old tailors dummy from a car boot sale and that gave me the idea of a super summer project for Sophie.

Together we are going to create her very own full size superhero!

Sophie was very excited when I showed her the dummy and talked about my idea.  Within half an hour she had come up with her superhero...


Rosalina, also known as Ace the Teleporter!

Ace has lots of superpowers - 

  • Strength
  • Supersonic Swimmer
  • Hypnotic eyes (apparently we will make her head too)
  • Superb speed
  • and on her costume there will be buttons. One of the buttons will release a hidden superpower...she will become camouflaged!
  • On the base she will have fast release rocket boosters too!


I have promised that we will mix different colours of Powertex so that she has her own unique colours to match Ace's design.

So I think I have my work cut out to help her create her dream character!

We will be working in short sessions so it is fun, and Sophie has lots of creativity to look forward to.  Also for her mum and dad, the mess will all be here and not at their home!!!

I am going to blog the whole process so I hope you have fun joining us along the way. 


 Getting Started!

We popped on some small vinyl gloves and held them on with masking tape.  I made sure Sophie was well covered with a big apron.

We mixed up Ivory Powertex with a little red and some yellow to get the colour Sophie wanted for the base.  To that we added a small amount of Easy 3D Flex to make the mixture just a little thicker.  

As the dummy is made from some sort of foam we wanted to give it a really good base cover, and did 3 layers.  Over the upper body that we added some kitchen paper for additional strength.  Only the arm socket and neck will not be dressed but I felt this would give us a good base to start with.

This all took about an hour.  We left it at this stage to dry while we went off to search for fabrics and other interesting goodies to add next time.

So join us next time when we start to create the clothes and look for Ace - the Teleporter!

Bye for now
Fi and Sophie

Sunday, 9 July 2017

Mermaid with a Message

Hi there hope you are having a great summer so far...I have been loving this gorgeous warmth!

My favourite place is the beach, I love beach combing and seeing what's been washed up that can be used in art like bits of wood and sea glass.  But more and more I feel sad that our oceans are being cluttered and devastated by plastic, discarded fishing nets and so much more, and it is damaging marine life.  So I created a Mermaid with a Message for a recent Mannequin's and Mermaids workshop.


I used a polystyrene torso and and wood/metal base from Powertex UK .  I then used some 2mm aluminium wire to create the tail shape and extended up her body.  I secured using masking tape and used cheap tin foil to create the tail shape and then wrapped with masking tape.  I used Powertex Lead  and Stone Art to cover the torso.  I used knitted scrim for the tail on the reverse as this gives the impression of scales.  

I added Powertex to some lace trim and placed around the top of the tail fabric and added small  3D balls to the body and tail for texture and to imply those little balls of plastic that are found in cheap cosmetic scrubs that find their way into the water course and out into out oceans.  I then painted the base with more Powertex and embellished with tissue paper and more 3D balls in varying sizes.  Finally I rubbed Powertex into some net fabric and draped over her, as if she were caught while swimming.  I then left her overnight to dry.

I then used Easy Varnish with Powercolor and Colortricx pigments to add colour, I didn't go too far with this as I wanted to help her to get her message across, plastic and waste are damaging our oceans!

Finally I used some rusty wire to make some barbed wire and added to her body. This will be available in my etsy shop once I've had time to create one!


Hope you like this project and want to have a go yourself.  Post some photos on Powertex Addicts United  if you do we love to see what you create.

Bye for now
Fi xx

Friday, 9 June 2017

A Perfectly Pink Powertex Jelly Fish

I'm loving the POWERTEX shows on HOCHANDA today and I hope you are too!  Tracey and Anna have done us proud and I am so inspired! 

A day without Powertex is a day...well let's not even go there!

So here's another project to help you create your own Powertex art work.  It's time for a Jelly Fish! 

I remember my brother being stung by one of these critters in Llandudno when we were kids and that was not fun at all!!!! This however was....


As before, I did a rough layout of where I thought I would place my embellishments and textiles.  


TIP: Take a photo!  Once we swipe them off to get started it's easy to forget!


I started with Ivory Powertex and spread this all over and in the joins between the top and bottom peices.  I then spread it all over the strengthening piece.  

I love the way these have been designed!

I dried it with a hairdryer (then picked up all the embellishments that were blown over the floor by the hairdryer - woops!!)


Once dry I turned it over and did the same on the front.

I then poured a tiny bit of the Red Powertex into the Ivory and mixed it up. This gave me a soft to medium pink!

TIP: less is more in colour mixing as Powertex tends to dry darker!

I spread the pink Powertex all over the front and then started to add my texture.

First I started with some of the lace and ricrac braid.  Using the lace around the curved top of the jelly fish and moving down to the two outer tentacles with the ricrac braid.

Next the embellishments, circles and cogs.

Oh boy I had fun with this, it was kind of like karma thinking back to my unfortunate brother falling foul to their nasty sting!  

I have to say I haven't had so much macabre fun in ages!!!


Once they were all in place, I used some of the Powercotton from the embellishment pack to add a bit more texture.

I then sprayed with black bister for a bit of dimension and dried with the hairdryer and left the piece to dry overnight.

NOTE: you can dry this in a drying box to speed up but it was more convenient to me to leave overnight.  I also find this gives the metal embellishments chance to dry to a really hard fix.


I had fun on day 2 adding lots of colour to bring out all that fabulous texture and detail.

The first lot of dry brushing I did was with the Powercolour burgundy pigment with Easy varnish and my 3/4" Powerex Brush to go back over some of the areas I had covered with bister, this can be seen in the image above right.  

I then moved onto blue and green, as shown on the left.

Next one of my favourite colours, Yellow Ochre - you can seen this around the tentacles in the image to the right! 

As I always do, I added bits and bobs of colour in various places sometimes overlapping with what colour I had already laid down.  This really creates so much interest.

Finally I used my most favourite of the gold pigments Colourtrix Bronze Gold.

Here is my funky Perfectly Pink Powertex Jelly Fish in all it's glory!

Hope you like it and hope to see your Jelly Fish popping up on Powertex Addicts facebook page very soon!

Have fun and bye for now!
Fi xx


Oh so pretty Powertex Seahorse

So what did you think of the fabulous PowertexUK launch shows on HOCHANDA last night with Tracey Evans and my hugely talented Powertex DT teamy, Anna Amelia Howlett of Rosehart Studio?  What fabulous products they have bought us and oh my... their projects!!!!!

I love all the hustle and bustle that preparation for live shows bring with them and I have been very blessed to have been able to play with some of the gorgeous products they have bought you to create this rather pretty Seahorse and in a later blog today there is a perfectly pink Jelly Fish.

Before I started I spread out the embellishments and textiles on my workbench and came up with a rough idea of placement.  I chose to work mainly with the floral elements for my seahorse so that I could get two very different looks.

So to get started, I brushed some Ivory Powertex along the seam of the two main pieces and then brushed more Powertex onto the back of the square mdf piece and pressed this down over the join.  This gives great stability and you can also use this area to put the hanging loop on.

I then spread Ivory Powertex over the entire back and dried off with a hair dryer. I then turned it over and spread Powertex of the front and edges.

Next I started to put the embellishments into place having first coated with Powertex.  I tend to drop them into the Powertex and then rub with my hand.  This ensures that the Powertex gets into all the nooks and crannies and means we will get a superb bond ...you know the kind that Powertex is famous for!

I began at the head of the Seahorse, I used one of the circles that I snapped in half and placed in the nose area to accentuate the smile that I always think of when I look at Seahorse.

I also left some clear unembellished areas so that I could work with the Black Bister later.

I gradually moved down the body of the Seahorse adding some lace to the outer curve accentuating the spine and then some of the RicRac braid on the inner curve.

I pressed some flat and left some proud of the base as this will give extra texture and dimension.  I also left some overhanging the edge, again to add dimension.

I continued to build up the texture using the embellishments and under some of the metal pieces I rubbed some Powertex into some kitchen paper and scrunched up to raise them further and also to aid the bonding with the metal and Powertex.


Once I had added all my embellishments I added some more Powertex to the areas I had left empty.

I then sprayed liberally with the black bister and then used a hairdryer to dry off some of the bister and create a bit more textural interest with a bister split.

I then left the piece to dry overnight.


Day 2...let's get colourful and bring out the character using the various pigments that are in the One Day Special as well as the Easy Varnish.

As with the embellishments I made to colour palettes from the pigments in the kit so that the looks were very different. 

I used the Turquoise and green first and then moved on to burgundy and lilac.    

I don't add all the same colours over everything, I tend to pick out areas but allow some overlap so there is little or no evidence of a join.    

I carried on with the colours over the entire piece.


Once the main piece was coloured I decided to add a pop of colour.


So using the orange I hightlight just a few of the flower centres and the wings on butterflies.


Finally I used silver to add a bit of lustre to what I think is a rather pretty Seahorse!

Below are some close ups to show you how I created the detail, highlights and shadows.


I hope you like her and enjoy using your Powertex One Day Special and create a fabulous Seahorse of your own.

Please share your makes with us over on our facebook page Powertex Addicts United.

Keep watching Tracey and Anna on HOCHANDA and pop back later today and there will be another step project for you to follow using more of today's fabulous POWERTEX products.

Bye for now
Fi xx